Opting-in as a Validator
Participation of L1 validators in the mev-commit protocol is crucial as it enhances the integrity of commitments and ensures their enforcement. This document details the steps required to join the mev-commit testnet as a Holesky validator. Future updates will introduce a restaking feature via Eigenlayer. Prerequisites:- An operational Holesky validator node.
- An operational mev-boost sidecar or equivalent.
- Associated validator key(s).
Requirements
By opting-in to the mev-commit protocol as a Holesky validator, you agree to the following:- Your mev-boost client should ONLY connect to mev-commit opted in relays to avoid being slashed by proposing a block that doesn’t deliver commitments. The Titan Holesky relay is the only supporting relay at this time as shown in the list below. This list will be updated as more relays support the network.
| Relay | Docs |
|---|---|
| Titan | docs.titanrelay.xyz |
Staking Your Validator Keys
1
Visit the Validator Dashboard
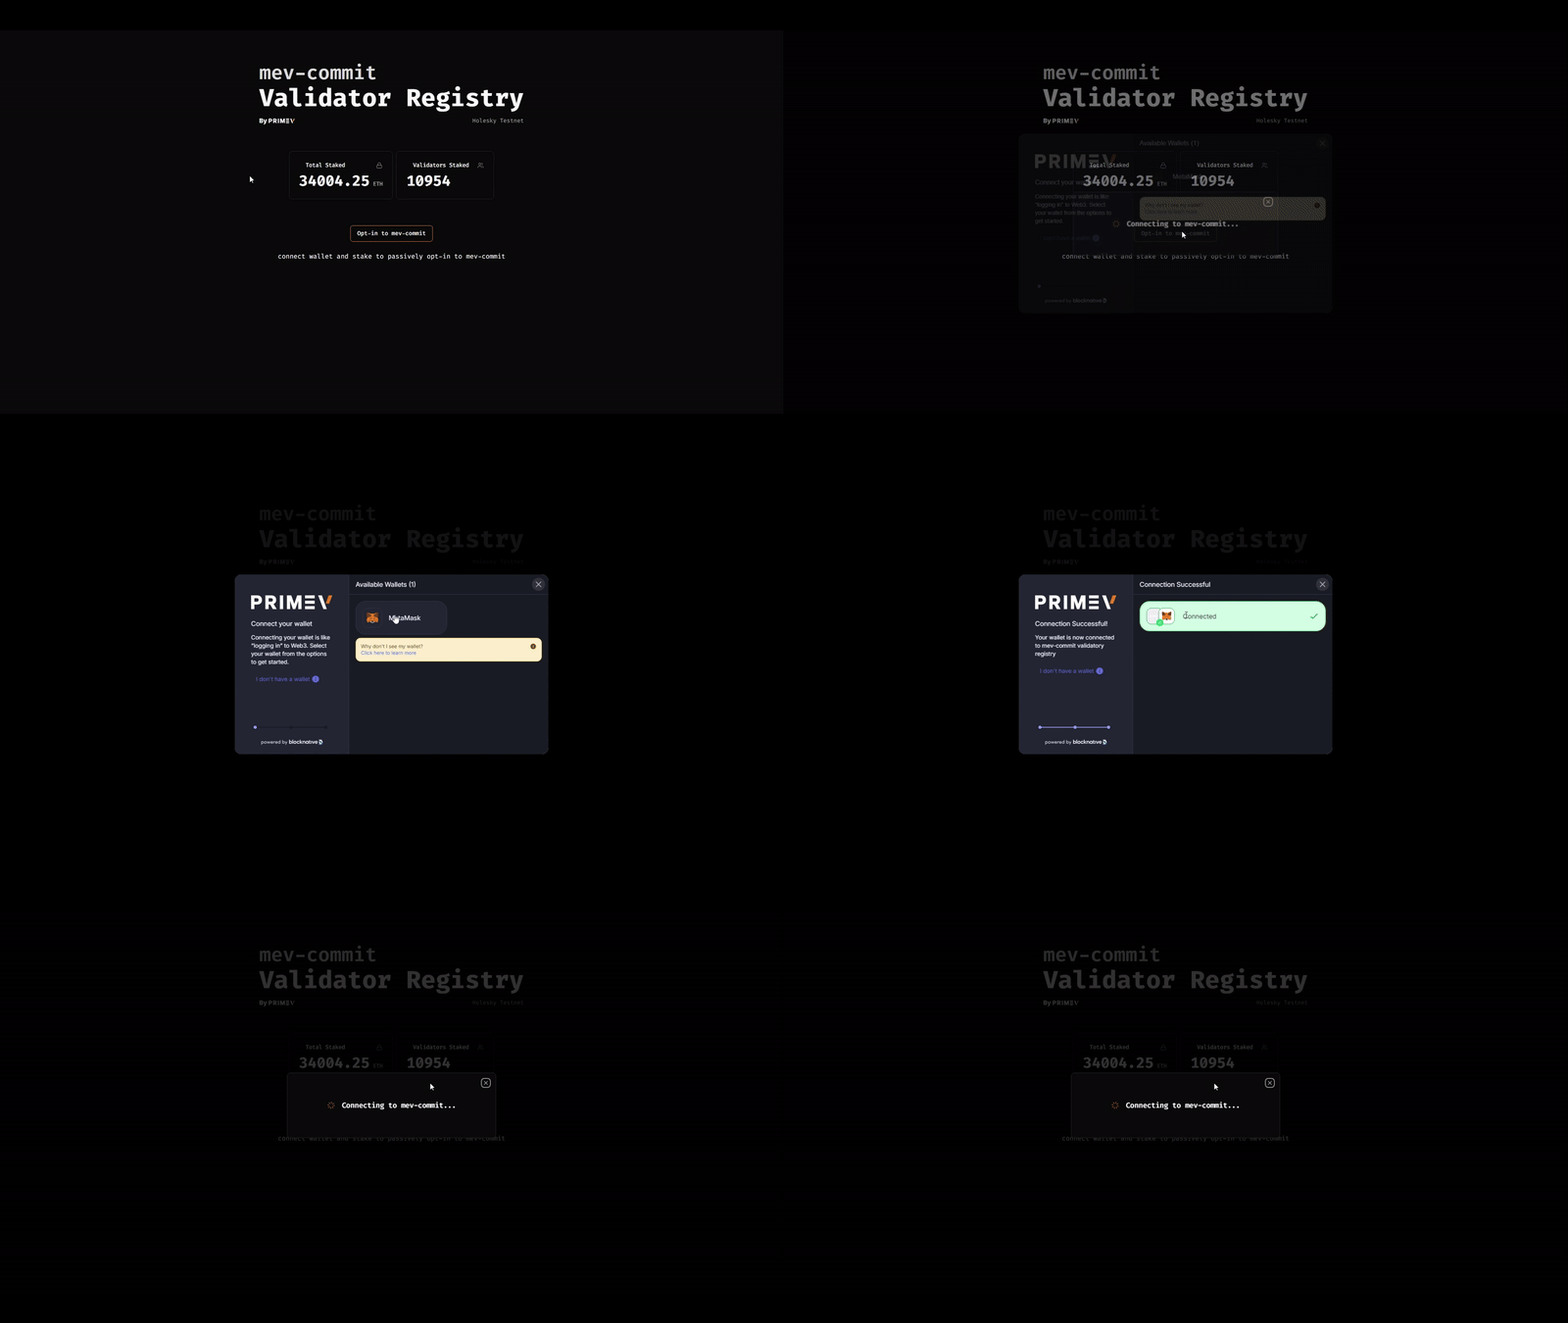
- Navigate to mev-commit Validator Dashboard.
- Press the “Opt-in to mev-commit” button to connect your wallet.

2
Acquire Testnet ETH
- Ensure that you have at least 0.0001 ETH on Holesky per validator pubkey to stake.
- If you don’t have sufficient ETH, see options from above.
3
Stake Your Validator Keys
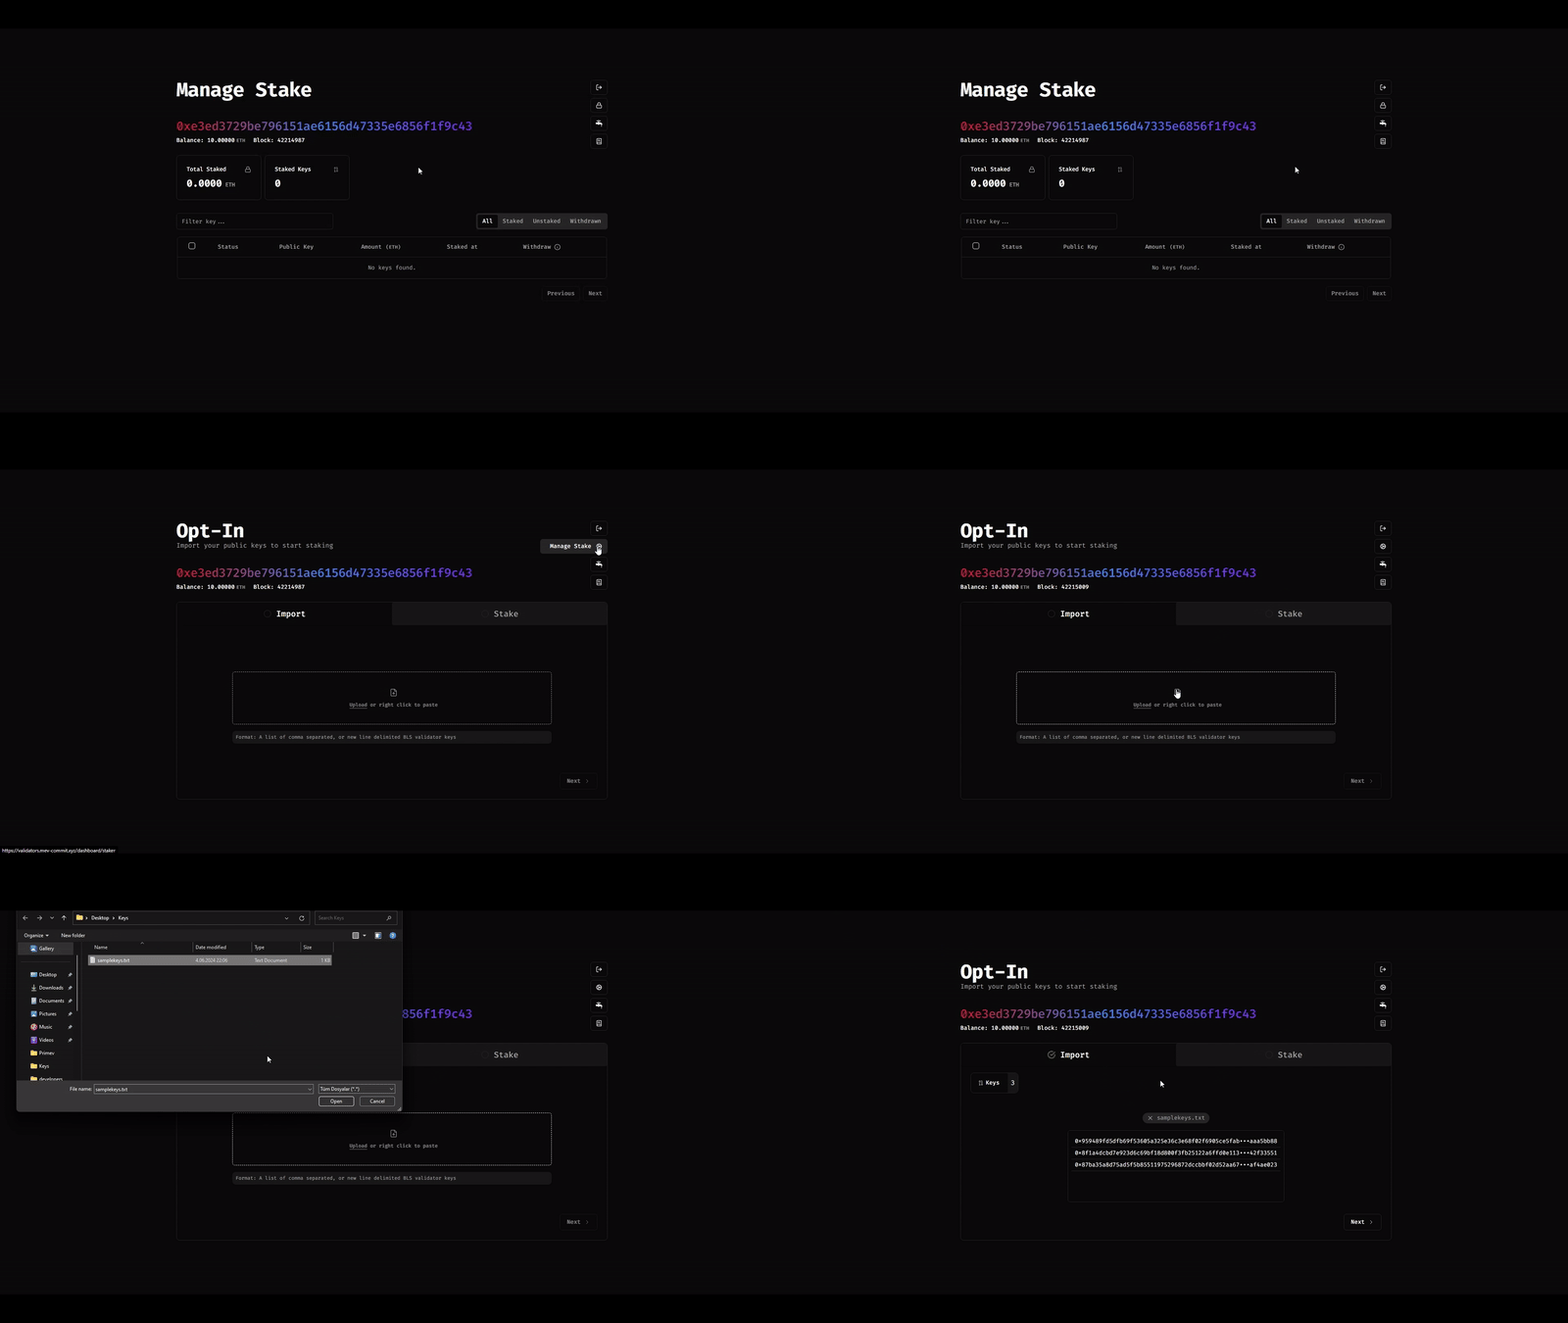
- Click the Stake(lock icon) button on the top right of the dashboard to initiate staking.
- You can either upload a .txt file containing your keys separated by commas or line breaks, or you can copy and right-click paste the keys directly into the field provided.

4
Enter Stake Amounts
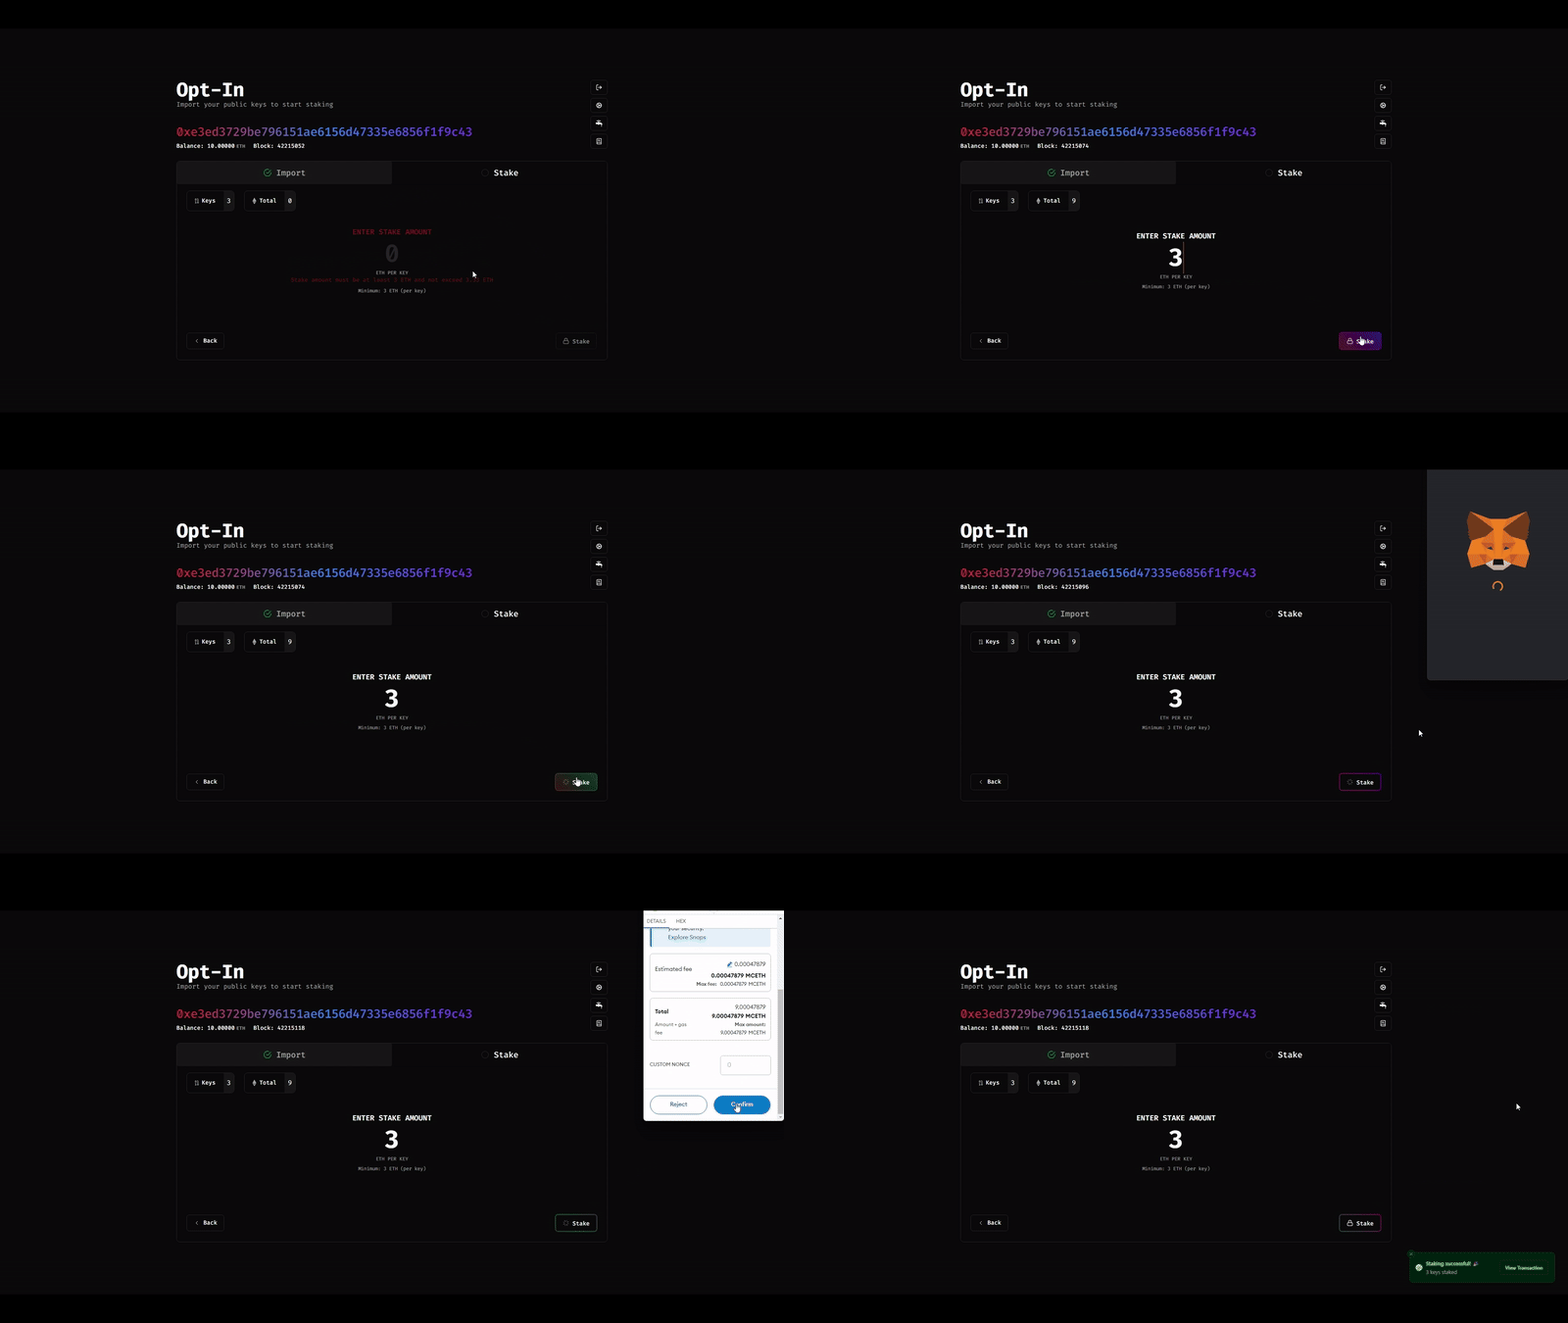
- Enter the amount of ETH you wish to stake for each key.
- Press “Stake” and confirm the transaction on your wallet to finalize the staking of your keys.

5
Manage Your Staked Keys
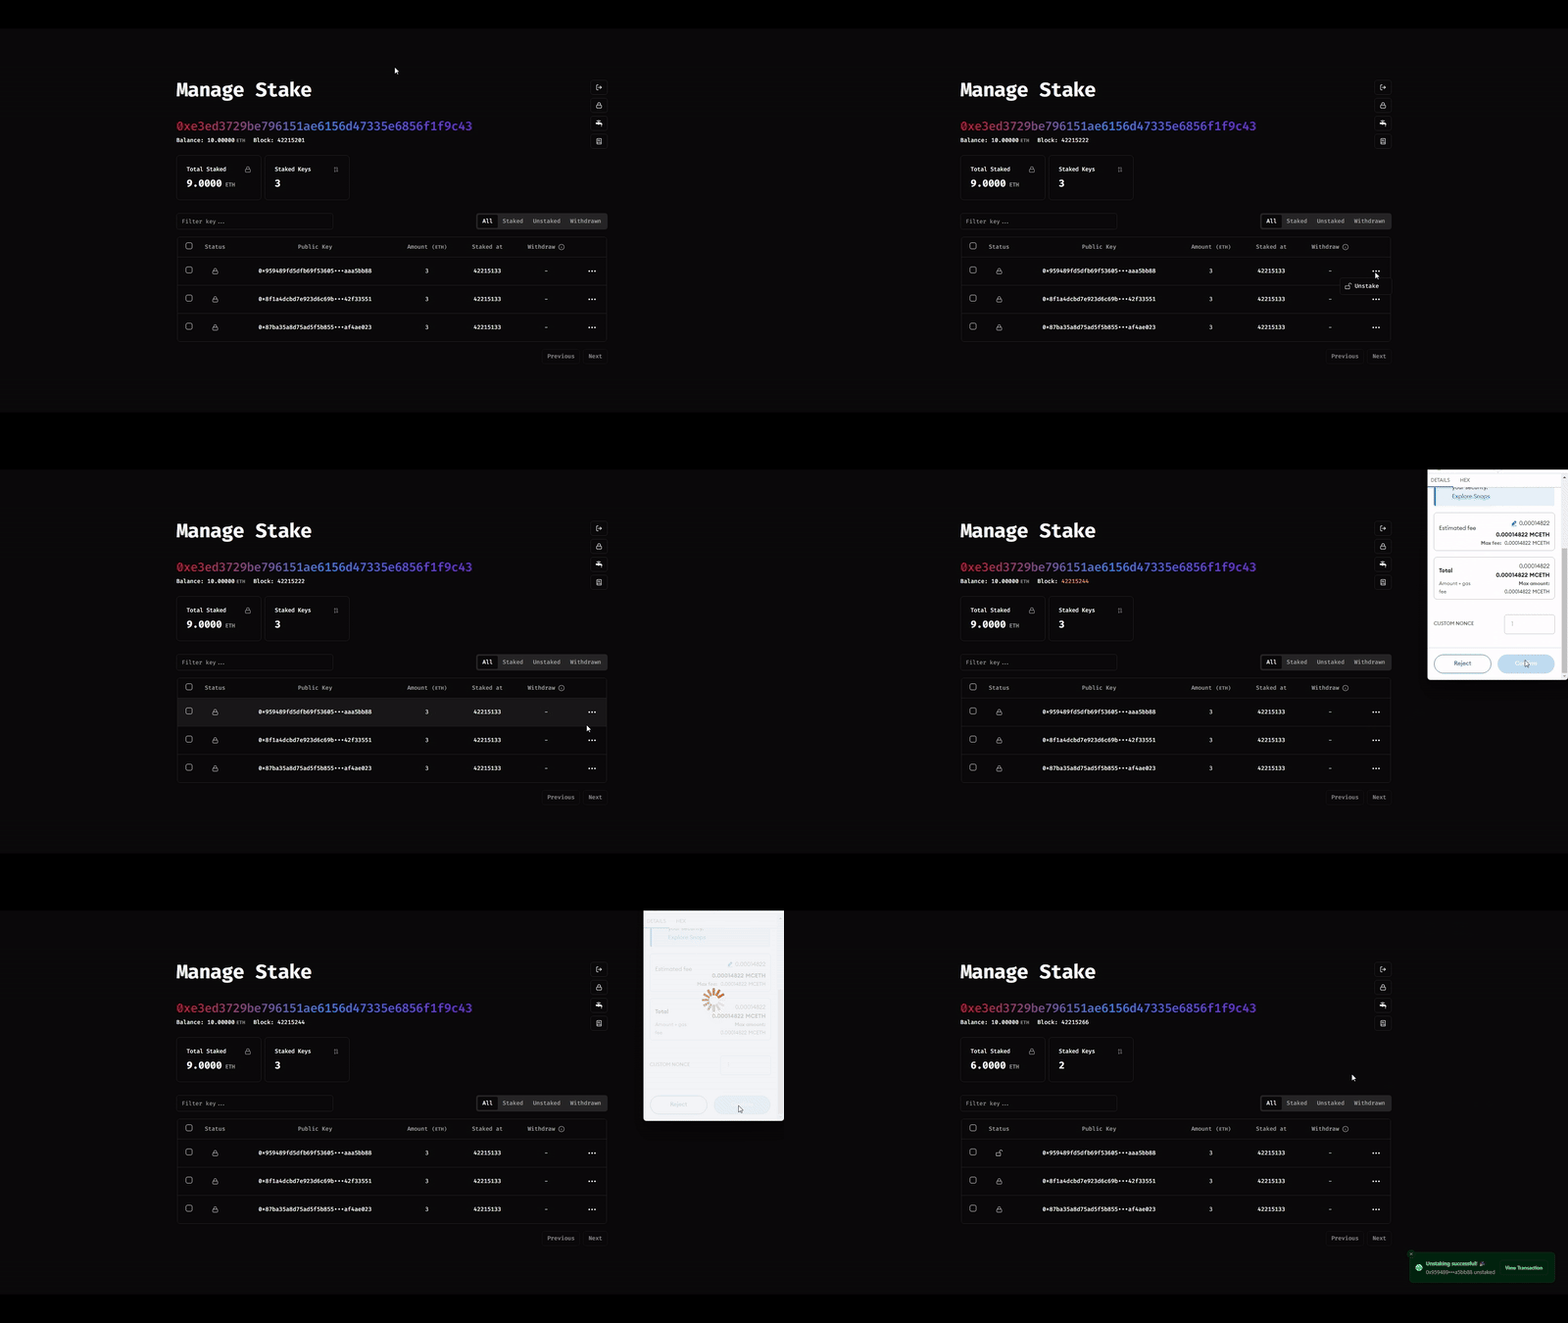
- After staking, you can view your staked keys by clicking on “Manage Stake”.
- To unstake your keys, you can multi-select the keys or use the meatball(3-dots) menu to unstake them.
- After unstaking, you will need to wait a 96 block of unstaking period before you can withdraw your ETH. The required waiting period will be displayed for each key on the “Withdraw” column.


